There are a few filters in Photoshop that can sharpen up your images… But there is another way, which can provide a little more control! Let me introduce you to the High Pass.

Performing actions such as resampling after a sharpen can introduce visual artifacts – for that reason, you should do this at the end of your processing when you are happy with everything else.
As a starting image i’m going to use this lovely shot of sunflowers by Marina Reich on Unsplash. From the original, I have cropped the file and made some other adjustments to more clearly show this technique.
Getting started, open the file in Photoshop. Now Duplicate your base layer (Cmd+J or Ctrl+J) – we’ll name it High Pass Sharpen. And then go Filter > Other > High Pass…
You will now see your image in grey with some shadows and highlights. Just to explain what you are seeing here: the filter works by looking across the image for obvious edges and then increasing the contrast around those areas.
You can adjust the effect Radius in the filter window. You will likely prefer to keep this effect subtle, but the ‘correct’ figure is subjective, and also dependent upon the resolution of your image.
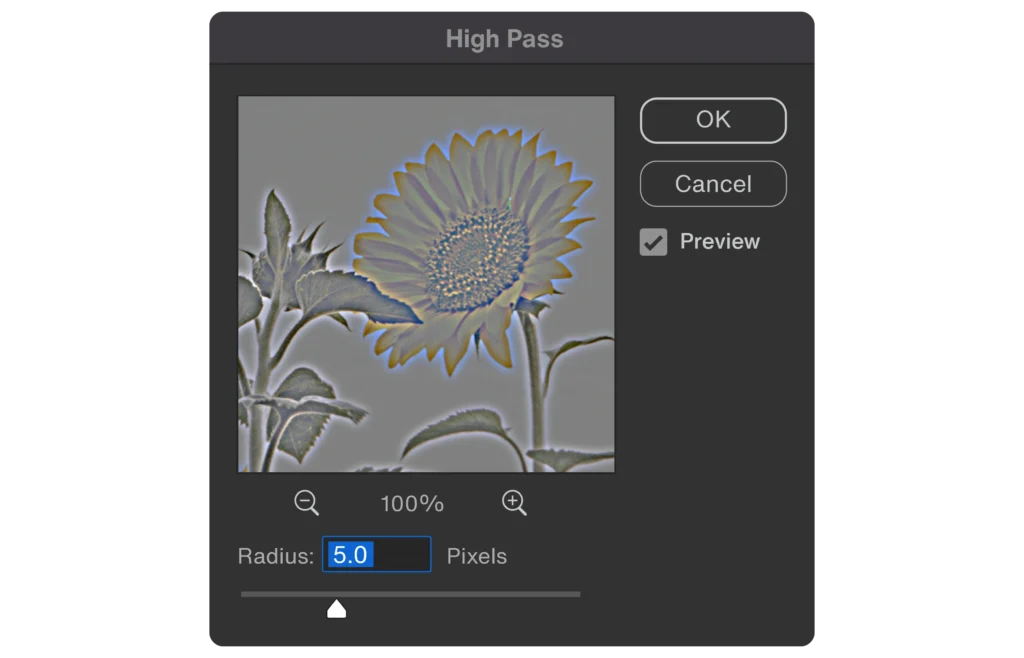
High Pass filter window with a radius of 5 pixels
For this example, I have resampled to dimensions suitable for this blog post. So in this case, a radius of 5.0 – where you can see the obvious ghosting, is probably going to be far too high.
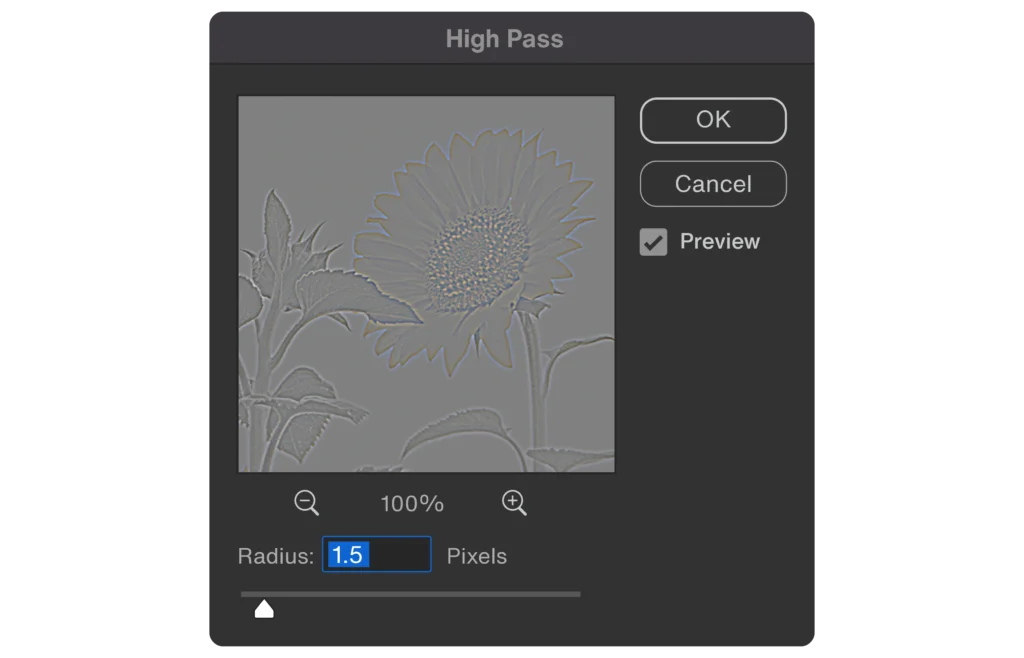
High Pass filter window with a radius of 1.5 pixels
Going for 1.5 is a bit more subtle while still being strong enough to show the results here. You might want to go lower than this.
Next, using the Layers panel, change the Blending Mode to Overlay. By all means play around with the other modes in this group, such as Soft, Hard, Vivid, Linear, or Pin Light.

The original image.

Following the application of the High Pass described above.
To quickly compare the difference in sharpening, you should zoom in to 100% of your image, and toggle the visibility of the new layer on/off. You can also change the intensity of the effect by adjusting the Opacity value of the High Pass layer.
—
Header Image: From the quite brilliant Everett Collection on Shutterstock.